Doing what we do best... dining

Monday, November 1, 2010

November?? Already???

How can it possibly be November already?? I remember when I was young(er), old(er) folks used to rattle on and on about how time flies. I wondered to myself, does time speed up with age?? Well, I can answer that for myself; yes. In fact it does. It must, because I swear it seems October just began. Yet today, I logged on to ebay and it proudly informed me that Christmas is just 54 days away. Thanks, ebay...

Holiday party invitations have already graced our mailboxes and voicemails. And I have begun shopping for the perfect holiday dress for this year's Starlight Ball. Our stockings are hung -but they have been since July - and our Christmas ornament for 2010 is on the bookshelf waiting for the tree to go up. I've started a list of Hanukkah and Christmas gift ideas... which is to say I have names of would-be gift recipients noted, with nothing else added yet.

The stress of the holidays is creeping in. Having so many family members (a blessing) and deciding how to be in numerous places simultaneously (a curse) has been on my mind. As I was at the beginning of fall, I'm trying to simplify life. Control the things that I can and should and leave the rest to happenstance. I'm working on it.... not a pro yet.

Many gatherings we are going to, and certainly the same is true for you, are potlucks. Here is a simple and very tasty recipe that follow us to many parties. Hopefully this will help simplify that "what-to-make" stress that accompanies holiday invites.

This recipe came from Brian's Mom, MaryAnn.
He just made a few "Miller-fi-cations" here and there.


BROCCOLI SALAD

You'll need:

2 large bunches broccoli, just the florets
4-5 strips bacon, fried & crumbled
1/2 cup sunflower seeds
1/2 cup pine nuts
1 cup raisins
1 small red onion, diced
1 cup mayo (or miracle whip)
1/4 cup sugar
3 tablespoons red wine vinegar


The Steps:

Mix the broccoli florets, bacon, sunflower seeds, pine nuts, and onion in a bowl.


In a separate bowl, mix the mayo, sugar and vinegar. Pour over broccoli mixture. Mix well and refrigerate overnight.


Easy enough?? There. You can check one thing off your holiday 'to-do' list. Enjoy!


Monday, September 27, 2010

Living, simplified.

Yesterday may have started out a bit chaotically. For me, though, the chaos began in the wee hours of Sunday morning; around 3:00 or 4:00 AM. I started thinking about my fall/winter clothes closet. Oh. My. GOD. Circa March or April of this year, I knew long sleeves and sweaters could fairly safely be put to rest until September or October. Fleece, wool, heavy cottons and even some sweatshirts were crammed into the shelves of the fall/winter closet. When I say crammed... think Hoarders. My closet should have been damned. We live in a 100+ year old house (closets are small) and I don't like to get rid of clothes ("I might wear that again..."). Not a good combination. So, before the crack of dawn on Sunday morning, I knew it. An epic expunging of my closet was about to occur.

Armed with nothing but sweet desires for organization and simplicity, Operation Evacuate Closet began. Step one: Warn the Husband. These types of events never go smoothly. I crave organization - I despise trying to achieve it after failing it for so long. So I warned him. He and Gracie bravely decided to be spectators. I began hurling piles of garments onto the bed. Armload after armload. At one point, burying the Boston Terrier (don't get upset... she loved it). By the time the three shelves were vacant, I was left with a 3 foot tall pile of clothes on what used to be my bed. I'm pretty sure I said a few colorful words and wondered what the hell I was thinking at this point. There were garments I barely recognized, and a few I swore I'd never seen. Clothes I remember buying in high school. Sweaters that wore more 'pills' than actual fabric. "Hello, my name is Kristin, and I'm a clothing hoarder." Ugh.

Piece by piece, Brian and I went through it. Sizes anywhere from 2 - 12, hues ranging from fuchsia to forest green. Three piles: 1: keep it, 2: donate it and 3: wow that's not recognizable as proper attire. The pile that remained, I then folded, stacked by color and weight. The beautifully organized and simplified stacks were then placed into a very welcoming 100+ year old closet. And I enjoyed the thought of it all day. Isn't it lovely?


Oddly enough, this really does relate to food. Glorious and simple fall food. Early autumn is ripe with delicious flavors. Produce that doesn't need much assistance to be a delicious and healthy meal. Below are two very simple, very extraordinary recipes that are perfectly timed for this cooler weather. Crabcakes and Roasted Root Vegetables. With both, the main ingredient doesn't need to be all dressed up... they're perfect in a more natural state.

Maryland Blue Crab Cakes

You'll need:
(Serves 2 with 4 cakes)

8 - 12 oz. chuck Maryland Blue Crab (or YOUR favorite crab)
1/3 cup (approx.) mayo
2 egg yolks
1/3 cup ground bread crumbs
1 tablespoon Old Bay Seasoning (or to taste)
Pinch fresh cracked pepper
Pinch garlic powder

The steps:

Very lightly, mix all ingredients by hand, careful not to break up the lumps of crab. Be very careful of shells - try to remove all small pieces.

Form into patties.

Bake at 350 degrees on a lightly greased pan for 20-25 minutes. The top will be a nice, golden color. Remember, you're cooking with eggs - make sure you cook it through.

We serve ours with Emeril's Garlic Aioli Recipe.

------------------------------------------------------------------------

Roasted Root Vegetables

You'll need:

Approximately 1/2 cup of your favorite diced root veggies.
Make sure you cut them all about the same size, so they cook evenly.

We used:

Onion
Parsnips
Carrots
New Potatoes
Sweet Potato

Olive Oil (enough to lightly coat the vegetables, around 1/4 cup)
2-3 cloves garlic, minced
1/8 cup shallot, minced
1 tablespoon fresh thyme
1 tablespoon fresh basil
1 tablespoon fresh rosemary
1 tablespoon crushed red pepper flakes
Salt & Pepper to taste

The Steps:

Prep a 9" x 13" pan with Pam or olive oil.
Mix everything together in a large mixing bowl. Lightly toss to evenly coat. Put into the baking pan.
Bake at 425 degrees for 30-40 minutes, until vegetables are tender.

Eat, enjoy!!


Enjoy the fall, friends. And do yourselves a favor; simplify.

XOXO


Monday, September 13, 2010

Who doesn't love cheese??

So, you may clearly see from almost every post I've made, The Miller's LOOOOOOVE cheese.Baked cheese, cheese cake, chicken stuffed with cheese. This entry will be no different.


This recipe was born after a trip to Salaam Restaurant here in Athens. It is a glorious, locally owned restaurant that features the most delicious world cuisine, right here in our small town. We love them. One summer afternoon, they had a feta dip served with warm pita. It was amazing, and Brian decided to recreate (with the Miller twists, of course). Happy Feta-ing. Oh hell, happy any cheese-ing!


Feta Spread

You'll need:

1 - 8 oz. package high quality, brick Feta cheese
Juice of 1 lemon
1 teaspoon Herbs de Provence
1-2 cloves raw garlic, minced
Approx. 1/4 cup olive oil (see note in steps)

Warm pita or bread of your desire
Sliced veggies; carrots, celery, etc... for dipping

The Steps:

Combine the first 3 ingredients in a food processor and mix on low. While mixing, slowly being drizzling in the olive oil. Use approximately 1/4 cup - but you may use less. Blend the spread until creamy.

Spread on veggies, bread, or crackers of your choice for a delicious starter. Enjoy!


PS - We are listening... if you have suggestions, feedback, or general love for us, let us know! We want to make sure you're enjoying reading as much as we are cooking, eating and writing.

Monday, August 23, 2010

F-words..... and pancakes.


Frustration, food and fable failure. Yep, that's what this blog is about.

I'm frustrated today. It wasn't a particularly awful day. Not productive enough either. Stressful, of course, but that's generally the case. Perhaps I'm a bit overwhelmed at work. I have a tendency to not see the forest for the trees. It's a personality trait I'd like to eliminate. There are days that all I see is a sea of deadlines and pub. dates and forget to take things one at a time. Rather like blogging sometimes. I get quite frustrated when words are flowing. (Like now). Brian has amassed many recipes and photos, yet I struggle with finding words to accompany the steps. I want the blog to be amusing and informative. Not simply the latter. I want you to get to know us through our food and fables. Today, this blog will be less story - simply recipe. Though that may tell you more about me than any tale could.

Here is a dish that always lightens my mood. Hope you love them as much as we do.

Cottage Cheese Pancakes (These are delicious - I promise)
Recipe serves 2. Double for more.

You'll need:

1/2 cup unbleached flour
1/4 teaspoon baking soda
Pinch salt
1 tablespoon sugar
2 eggs
1/2 cup cottage cheese
1/4 cup milk
1 tablespoon canola oil
1/2 honey-crisp or granny smith apple, bruniosed


Steps:

In a large mixing bowl, combine flour, baking soda, salt and sugar. In a separate bowl, whisk the eggs, cottage cheese, milk, oil and apples together. Combine the two mixtures.

Spray a griddle pan with an oil spray and heat over medium. Drop 1/4 cup (approx.) batter onto the griddle pan. Cook for a few minutes, checking the underside occasionally. Flip when browned and cook the other side.


Serve with fresh fruit, butter or maple syrup. Good for breakfast, lunch or dinner.
Enjoy!


Tuesday, July 27, 2010

Miller... we have a problem.

The last post, with the Creme Brulee recipe, created a problem. It wasn't an overly surprising problem (as I noted it at the end of the post), but an unfortunate problem, nonetheless. My waistline seems to have vanished. It's gone to the waistline graveyard with a tombstone reading"Here lies what was once Kristin's respectable waistline. Damn you, Creme Brulee."
It certainly wasn't a difficult or long, drawn out death. By my estimation, it only took about 4 weeks and approximately 15 servings of Creme Brulee (and an unmentionable number of other desserts here and there). That stuff is dangerous.

So now, back to exercising, and (hopefully) my road to recovery from my sweets addiction. Having just completed my first work out in waaaaaaaaaaaaaaay too long, I would like nothing more than a glass of wine and some burnt sugar atop light, fluffy custard. I'm settling for the glass of wine and blogging about my compulsion with confections. Spare tire be damned! I will see my waistline again soon!!!

On to food.... thanks for allowing the rant....

There has been a great deal of good cooking happening in the Miller Home. Birthdays and BBQ's have had Brian cooking all sorts of delicious fare. The recipe that follows is inspired by a dish at one of our favorite restaurants in Columbus, Cameron Mitchell's Marcella's. It's a great appetizer or first course. While not exactly heath food, it's excellent... enjoy in moderation.

Baked Brie with Apples & Honey

You'll need:

1 round of Brie cheese (do not remove rind)
1 small loaf of sourdough bread or brioche cut into small pieces
1-2 tart apples, thinly sliced
1/4 cup honey or agave nectar
Olive Oil (for the bread)


The steps:

Preheat oven to 350 degrees.

Place the bread on a cookie sheet. Lightly brush each piece olive oil. Just a sheer coating will do.
Place the Brie wheel, rind and all, on a cookie sheet. Bake on the top rack for 10-12 minutes, or until the cheese is oozing out of the rind a bit.
Remove and let stand for about 5 minutes.

While the cheese is cooling, place the bread in the already-to-temp oven. Toast them for about 5-7 minutes, until the tops are just browning.

Schmear the Brie on a toast, top with an apple slice, and drizzle with the honey or agave nectar. And wow do you have an amazing dish.

Eat and enjoy!


Monday, July 12, 2010

Mmmm....

It's Ohio Brew Week in Athens! Which, obviously means all things Ohio Brews. To us, however, it's also all things food. We have the pleasure of judging the Craft Brew Cooking-Athens Cuisine Showcase and Competition this Tuesday. Then the Brew-B-Q Cook-Off Competition on Friday. This will be our third year judging the Craft Brew battle. Each year the entries have really wowed us. Always unique; always delicious. We always leave with new ideas for cooking at home and extremely full bellies.

Since it's a foodie week for us, it seems appropriate to get crackin' on the food blog. I'm going to get as many recipes up this week as I can, including a Feta Spread that's been getting a request or two.

But first - the glory that is Creme Brulee. I'm in love with Creme Brulee. In fact, I'm having an affair with Creme Brulee. Scratch that, Brian & I are BOTH having an affair with it. I ask for it... he cooks it... and we both devour it. Back in June, I bought him a very self-serving gift. A Creme Brulee kit complete with 4 ramekins and a mini-blowtorch. The latter being the main reason he so enjoys cooking it, I might add.

So we've made it numerous ways so far and served it with various fresh fruits. Here is the basic recipe we've been using.


Creme Brulee (4 servings)

You'll need:

1 pint heavy cream
1 vanilla bean, split and scraped
1/4 cup sugar, divided
3 large egg yolks


The steps:

Preheat oven to 325 degrees.

Place cream, vanilla bean (and pulp) into a medium saucepan. Bring to a boil over medium-high heat. NOTE: Should you want flavored Creme Brulee, add something! This is the time to do so; while your cooking the cream & vanilla. We've added lemon zest, juice & zest of orange, and almond extract. They've all been delicious.

Remove from heat, cover, let sit for 15 minutes. Remove vanilla bean.

Meanwhile, in a medium sized bowl, whisk together sugar and the egg yolks until well blended and begins to lighten in color. Temper in the cream - going very slow making sure the eggs don't scramble, stirring continuously.

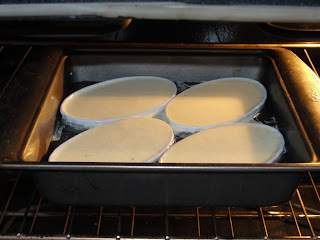
Pour the mixture into ramekins (approx. 7-8 oz size). Place the ramekins into a cake pan or roasting dish. Pour enough hot water into the pan to come halfway up the sides of the ramekins.

Bake until the creme brulee is just set - still trembling in the center (40-45 minutes).

Remove the ramekins and refrigerate for at least several hours.

Just before serving:

Remove creme brulee from refrigerator for approx. 30 minutes.

Sprinkle a layer of sugar on top of the creme brulees. Make sure it's an even covering. Using a torch (Brian's FAVORITE part), melt the sugar to form the crispy top.
Allow to sit for about 10 minutes before serving.
Top with fresh fruit. Blueberries, blackberries, wineberries, Clementine slivers, or whatever is fresh at the farmers market.


EAT. ENJOY. And DON'T FEEL GUILTY ABOUT IT.

CAUTION! Making this recipe just one time can severely screw your diet. I believe we've made it 4 times since mid-June. I feel only slightly guilty about that. Oops. Sorry waistline.... I'll see you again soon.

Sunday, July 11, 2010

Summertime... and blogging hasn't come easy.


I love writing. Brian loves cooking. Yet we've been terribly lax with our food blogging. We've been eating... just not blogging. Several people have asked where we've gone, and when the next blog will appear, so here we are. Glad to know you're enjoying!

Another post will be coming this week. And here's the early disclaimer -- it WILL NOT be a healthy one. But one I've become addicted to eating. And Brian has become addicted to making. Seemingly because he gets to use a mini-blowtorch.

This, however, is a health one. And quite tasty also. It's a great summertime chicken dish that is rather quick to prepare. Happy reading and eating!


Chicken with Honey-Orange-Garlic Sauce

You'll need:

4 boneless, skinless chicken breasts, trimmed
2 oranges
2 tablespoons flour
salt & pepper
1 cup chicken broth
3 garlic cloves, chopped
1 tablespoon canola oil
1 cup white wine (use a mild, fruity wine)
2 tablespoons honey
1 cinnamon stick
Assorted micro-greens

Steps:

First, zest and juice one orange. Keep in a small bowl. Peal and pith the other, then halve and slice.

Combine flour, salt & pepper in a shallow dish.Dredge chicken in the flour. Transfer remaining flour into a small bowl, add broth and whisk to combine.

Heat oil in a large, non-stick skillet over med-high heat. Brown the chicken (3-4 minutes per side). Remove from pan. Add wine to pan to deglaze (about 1 minute). Add flour/broth mixture, orange zest & juice, honey cinnamon and a pinch of salt. Bring to a boil. Reduce heat to a simmer.

Return the chicken to pan. Cook, turning once or twice until cooked through. Sauce should thicken. (10-12 minutes)

Remove cinnamon stick before serving.

Plate chicken, spooning sauce over it. Top with orange slices and micro-greens.

Serve with your favorite veggie. We paired it with lemon-basil carrots (recipe later).

Monday, June 7, 2010

Back at it


So after a vacation hiatus, we're back to blogging. We spent a wonderful week in Florida visiting (among others) Mickey & Minnie, Doc Brown and the time-traveling Delorean and a congregation of gators. We ate at some amazing restaurants, a few of which I review below. When we travel, we plan much around the restaurants we want to try. This vacation was no different. And many of the choices soared.

Emeril's Tchoup Chop was one of the highlights. Their "Kicked-up" crabcake appetizer was divine. It was adorned by a mango-habanero butter sauce and caramelized pineapple compote. Ridiculously mouthwatering. I could have eaten 5 of these things. I had a King Salmon filet with a gentle yamasa ginger butter sauce. Brian enjoyed a pepper grilled, yellowfin tuna steak with a ramp-ginger cabernet reduction. The sauces were exquisite. The service was exceptional. I'd go back to Orlando just for this restaurant.

Salt Island Restaurant matched The Tchoup Chop in service, and was a close second in terms of the food. They had a most extensive wine list and very knowledgeable servers. We had an appetizer called Scallops on Fire - scallops topped with Blue Crab meat baked in a fiery sauce. Pretty respectable way to start a great meal. Both the seafood and the steaks were well prepared and pleasing.

Another dining experience we enjoyed was Cameron Mitchell's Ocean Prime. They had the most delicious Crème Brûlée I've ever tasted. The wine list was pretty impressive also.

Anyway, back to reality (ugh!) - back to blogging (hooray!).

This recipe is one of Brian's original creations. And it's fabulous. The sauce is different every time. It just depends what we have on hand and what we're in the mood for. Tonight's sauce (the one below) will be especially delicious - sweet and spicy; my favorite combination of flavors.

When we first started making this, we fried the chicken. Tasty, but oil-laden. Brian tried it in the oven one night and the result was fantastic. Just as crispy; just as tasty. And MUCH healthier. That's how we've been cooking it ever since.

Panko Crusted Chicken with Sriracha-Peach Reduction

The Sauce:

First, start the sauce. In a saucepan, combine the following:
2 tablespoons butter
1/3 cup jam, jelly or preserves - tonight, we're using peach preserves
1/2 cup red wine - use what you drink
Sriracha - we use a lot, we like it hot. Use what your palate can handle.

Combine & stir all. Bring to a simmer over medium heat. Don't cover. Stir it occasionally.

Chicken:

Preheat oven to 350 degrees.

Start with boneless, skinless chicken breasts. As many people as you're feeding, that's how many you need.
Pound them out with a meat tenderizer. You'll want them about 3/4 inch thick. Once that is done, coat with Panko bread crumbs. These can be purchased in the Asian section of the grocery, or you can make them (more on that in another blog).
Lay flat on a cookie sheet covered with non-stick aluminum foil.

Bake at 350 for approximately 15 minutes or until cooked through completely.

Toward the end of the baking time, remove the sauce from heat and let cool slightly.

Remove the chicken from oven, and dress with the sauce reduction. So delicious.


Tuesday, May 18, 2010

The glory that is cheesecake


I LOVE cheesecake. All types of cheesecake. When I was growing up, I thought it sounded weird. I mean, I liked cheese.... and I liked cake.... but cheese+cake? No thanks. It was probably high school before I discovered the glory that is cheesecake. Brian, on the other hand, grew up eating cheesecake. Both his mother and father love it - so he tried it and loved it pretty early on.

We've (Brian) has made many cheesecakes since we've been together. Vanilla, dark chocolate, key lime, etc... He's used the very richest fillings (cream cheese & sour cream) to the lighter, fluffier (Ricotta) styles. They are all great. Toppings have ranged from melted chocolate to pureed fruit. Yum.

Obviously, this isn't one of our healthier posts... but I warned you in advance.

This particular recipe was what he made for Mother's Day this year.

Lemon Cheesecake with Key Lime Whipped Cream

You'll need:

Crust:
2 cups graham crackers crumbs
1 stick butter (melt)

Filling:
2 -8oz. bricks cream cheese (room temp)
15oz. ricotta cheese
1/2 cup sugar
1 teaspoon vanilla
1/3 cup fresh squeezed lemon juice
Zest of 1 lemon
4 egg whites, lightly beaten
1/4 teaspoon salt
1/3 cup sour cream

First, preheat oven 325. Mix graham cracker crumbs & melted butter together. Press into the bottom of a spring-form pan. Bake for 7-10 minutes or until golden brown. Remove & set aside.

Next, combine cream cheese & ricotta. Mix until smooth. We use a Kitchen Aid mixer for this and the following steps.
Add all remaining ingredients, beat until smooth.

Put the spring form pan onto a backing sheet. Pour about an inch of water onto the baking sheet. This will prevent the cake from cracking. Pour mixture on top of crust. Bake for 50-60 minutes or until cake is firm.

While it's cooling - onto the Key Lime Whipped Cream:

You'll need:
2 cups heavy whipping cream
2/3 cup sugar
1/4 cup key lime juice

Pour all together & mix. Beat until peaks are formed. We used the Kitchen Aid again, but a hand mixer works fine too.


Try NOT having a piece every day when you have it in the house. Then tell me how you did it, if successful. I FAILED. Enjoy!

Monday, May 10, 2010

Because it's better without mayo...


You MUST try this slaw. Brian & I are not huge fans of traditional coleslaw. I've had some I like - but for the most part, yuck. Not a fan of mayo - and Miracle Whip is just odd on cabbage. Brian created this recipe several months back. He made BBQ pulled pork for sandwiches and wanted a tasty, healthy alternative to mayonnaise based coleslaw. This is it. It's bright, full of flavor and is best a day or two after it's made.

Spicy Apple Slaw

You'll need:

1 large head cabbage - use your favorite. This time, we used Napa
2-4 jalapeños (how spicy do you want it?)
1 apple - Granny Smith go very well, but again, use your favorite
2-3 carrots
1/2 cup apple cider vinegar
1/3 cup extra virgin olive oil
2 teaspoons cumin
1 teaspoon cracked black pepper
1/2 teaspoon tarragon


First, shred the cabbage. Give the jalapeños and apple a very small dice. Shred the carrots (we use a potato pealer). Put all in a large bowl.

In a small bowl, mix the vinegar, oil and spices. Whisk together. Pour over the slaw mixture and give it a good toss. Cover, refrigerate for at least 4-6 hours and enjoy!

Sounds easy enough right? It's the PERFECT spring side dish. Bold and refreshing flavors and versatile enough to go with almost anything.


Monday, May 3, 2010

Our first (real) date


Brian & I met at the Cat's Eye Saloon in Athens. Sometime around April of 2005. He had recently graduated from OU and was still in Athens - bartending there several nights per week. I had just moved back to Athens, selling houses and positive that I'd be single forever. I mean, come on... I was 26 and moving back to a college town. I figured there wasn't enough wrinkle cream and/or work out videos to let me pass for an undergrad, therefore - screwed. Athens is not exactly a hub of the young professionals single scene. I digress...

Anyway, I reconnected with an old friend who met me out at Cat's Eye one evening. I remember seeing this short guy strolling through the bar with a swagger and confidence that appealed to me. Not enough to give me courage to ask him out.... but still quite appealing. Instead, I started finding reasons to have a drink at Cat's Eye on the most random nights.... until I figured out his schedule. That made it much simpler. I'm not a crazy stalker or anything... just a bit shy and hoping he'd make the first move. I mean, how many nights can one girl find reasons to go drinking?!? Finally --- after my close encounter with alcoholism (just kidding, Mom) --- he asked me out.


He invited me to his place for dinner & wine. I was supposed to bring a side dish. EPIC FAILURE. I attempted to make some sort of cheesy potatoes. It didn't go so well. I burnt the hell out of it. It ended up in the garbage. Now what?? Dinner in just a few hours... no side dish. I did what any girl in my position would do. Stopped by Kroger, picked up a pint of Cherry Garcia ice cream, slapped on some lipstick and headed to Brian's house. Where I deliberately didn't bring up the side dish drama. And God bless him; he never asked.


The following recipe is what he cooked for our dinner that night. Three years and several months later, the same dish was served at our wedding.
I never knew food could be so personal or evoke such a great feeling. It is so every time we cook this (like tonight!)


Feta Stuffed Chicken

You'll need:

Boneless skinless chicken breasts (however many people you're serving, that's how many you need - this recipe based on 2 large ones)
8 oz. of Feta cheese
Diced onions - about half of one
Fresh chopped garlic - we use a ton, use your judgement
Fresh chopped basil - 5-10 leaves
The juice of 1/2 a lemon
1 cup white wine
Olive oil
1 tablespoons of butter

The process:

Preheat oven to 350.

Mix the cheese, half of the onions, half of garlic and most of the basil in a medium sized bowl and set aside.

Wrap the chicken in plastic wrap and pound very thin with a meat tenderizer. Meat should be about .5 to .75 inch thick.
Place the chicken in a lightly oiled baking dish. On one side of the chicken, place 4-5 heaping tablespoons of the cheese mixture. The amount you add depends on the size of the chicken breasts. Fold the other side of the chicken over the mixture. You don't need to pin it down in any way... the feta mixture will act as a "glue" to keep it together.

Atop the chicken, place the additional basil onion and garlic. Also add the wine and butter to the top of the chicken and to the bottom of the pan, to keep the chicken moist.

Bake for 25-30 minutes. Baste the chicken in the wine & butter sauce every 10-15 minutes.

Serve with a green veggie (or Cherry Garcia ice cream...) and enjoy!!!


A simple side


Until I started dating Brian, I'd never eaten a brussel sprout. And I wasn't too amped to try them. Now, we eat them at least once per week. If you like cabbage, you'll like sprouts. And this simple recipe will make you love them even more.

Simply Shredded Brussel Sprouts

You'll need:
Approx. 1 pound of brussel sprouts
Diced onion
Fresh chopped garlic
Approx. 1 cup white wine (use what you drink - we typically use chardonnay)
juice from 1 lemon
fresh cracked pepper
sea salt

First - shred the brussel sprouts. You can use a food processor or by hand.
Sauté the onions on med-high heat in about 1/4 cup of the wine. Give it about 3 minutes. Then toss in the garlic. Give that about a minute - just long enough to let the kitchen fill up with that delightful smell.

Next, add the shredded sprouts, the remainder of the wine and the lemon juice. Turn down the heat to medium and let it dance around the pan for a while. About 20 minutes - just long enough for the sprouts to get a little tender and soak up that glorious flavor.

Lastly, give it a hit of fresh cracked pepper and some sea salt, to taste. It's quick, simple, delicious and healthy. YUM.


Sunday, May 2, 2010

Our maiden voyage


I don't really know how to start a food blog. My cooking skills are limited, at best, and Brian doesn't use traditional recipes. So this should be interesting.... here goes.

Since we first started dating, Brian has enjoyed cooking. And he's quite good at it. Through the 4-ish years we dated and the year that we've been married, what we eat has changed at bit. Moving away from processed, packaged foods and more into healthier, tastier treats. It is a recipe Brian created with influence from one of our favorite restaurants.
Roasted Butternut Squash & Carrot Pita Pizzas
You'll need:
4-6 pitas
Medium size butternut squash
carrots - trimmed
fresh mushrooms (use your favorite)onion
shredded cheese (we use part skim mozzarella usually)
First - roast the squash and the carrots in a 350 degree oven. Drizzle both with just a bit of olive oil and salt. The squash takes about 30-40 minutes. The carrots take about 20.

In a baking dish, roast some diced onion and mushrooms. Just a bit of olive oil and salt again. Give them about 10-15 minutes in a 350 degree oven.

Mash the meat of the squash and the carrots together in a bowl.
Next - spread a generous layer of the squash mixture on top of each pita. Next, add some of the onions & mushrooms. Finish it off with about a palm full of your cheese of choice.

On a baking sheet, pop them in the oven for about 10-15 minutes. Just long enough for everything to get hot and the cheese to melt. Once out of the oven, cut into pieces and enjoy!

Important disclaimer: I am NOT a food photographer. These look quite tasty, despite what my (lack of) photographic skills may communicate.

We love food. We love eating healthy, delicious foods. And we love each other. We're excited to share some of what we love with you.